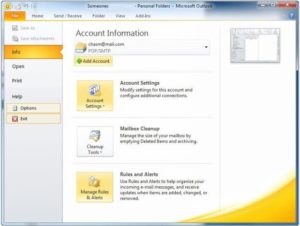
1. Click on File, then Info, then Account Settings, and Account Settings.
2. Click New in the top-left corner.
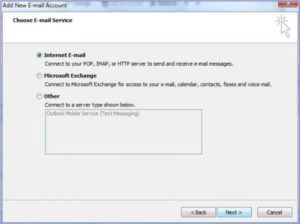
3. On the Choose Email Service page, select Internet E-mail. Click Next.

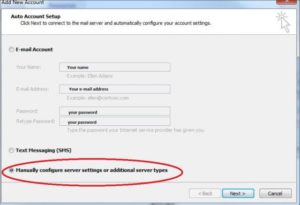
4. Click to select the Manually configure server settings check box, then click Next.
5. Select Internet Email and click Next.
6. Fill in the boxes in the Internet E-mail Settings dialog box. Make sure that the Account Type setting is set to POP3.
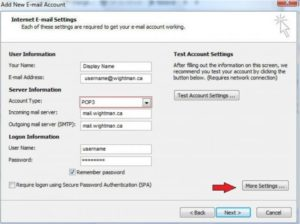
- Fill in your name, full e-mail address & password.
- “Your Name” is the name shown to the receivers of your emails.
- “E-mail Address” is your full Wightman email address.
- “Account Type” must be POP3.
- “Incoming mail server” is mail.wightman.ca
- “Outgoing mail server (SMTP)” is also mail.wightman.ca
- “Username” is the part of your Wightman email address that is before the @ ie: [email protected]
- “Password” is the password you set up with a Wightman Customer Care rep when your email address was created.
- Then click on More Settings.
7. Click on the Outgoing Server tab.
8. Ensure there is a check mark in – “My server requires authentication & use same as my incoming server”.
9. Go to the Advanced tab.
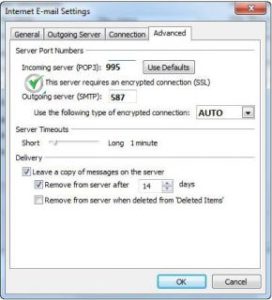
– Ensure the Incoming server (POP3) port is “995”. Ensure that the check mark is on – “The server requires authentication”.
10. Click OK.
11. Click Next, follow the prompts to finish setting up your account, Click Next.Click Finish.