Described Video is a feature available on many channels and/or programs that describes the action appearing on the screen for the visually impaired. To turn on Described Video:
- Press the menu button on your Wightman remote
- Select Settings, then Display.
- Scroll to Audio Language and use the right arrow button on your remote to selected Described Video. Then press OK.
Now, any program with Described Video available will play it along with the standard audio.
Press the LIST button one time to access the list of Recording Folders. The All Recordings folder appears first and includes all the recordings you have stored on your DVR. If grouping is enabled in your settings, each program will also have a folder including all recordings of that program. To move in and out of the folders, use the Left/Right arrow buttons. At the top of the screen, you see the number of folders and the amount of space you have free on the DVR.
When you are in a program folder:
- Delete a recording by pressing the Red button on the remote control.
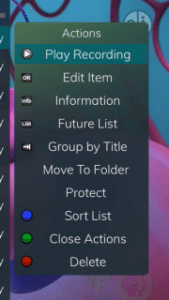
- View the available Actions by pressing the Green button on the remote control. Actions include Play Recording, Edit Item, Information, Go Back, Move to Folder, Protect, Sort List, Close Actions, and Delete Recording.
- Search for programs within the Recording folders by pressing the Yellow button on the remote.
- Sort the Current Recordings by pressing the Blue button on the remote control. By default, Current Recordings are displayed by date and time. If you press the Blue button, programs will be sorted by Name.
- Press the Skip Forward button to view recordings by title rather than group.
Current Recording Actions
To view the available Actions, press the Green button on the remote control. The Actions list displays on the right hand side of the screen. To make it easy for you, the list of Actions on the screen shows the corresponding button that you could press on the remote control. It is also possible to highlight your selection and then press OK on the remote control.
- Select Play Recording to start the currently-selected recording.
- To extend the end recording time on a recording in progress, select Edit Item.
- To show or hide Information about the recording, press the INFO button. This expands or hides the view of information. Simply highlighting a recording and pausing for a brief moment will also display the information.
- To Go Back to the previous screen showing All Recording Folders, press LIST.
- To move the recording to a specific folder, arrow to select Move To Folder.
- To group the recordings by their titles, select the Skip Forward button.
- To Protect a recording so that it does not automatically get deleted, use the arrow buttons to highlight the protect option and then press the OK button. When you do, a shield symbol will display next to the program name, letting you know that this program is protected. If you want to remove protection from the recording, simply choose Protect again.
- To Sort the List of Current Recordings, press the Blue button on the remote control. At the bottom of the screen, you will see the sort change to being sorted by Name. Press the Blue button again to change the sort back to date and time.
- To Close the Actions, either press the Green button or press the EXIT button on the remote control.
- To Delete the Recording, press the Red button on the remote control. Select Yes or No to delete and then press the OK button.
Future Recordings
Press the LIST button a second time to view your list of Future Recordings. These are programming events that are waiting to happen. At the top of the screen, you see the number of recordings and the amount of space you have free on the DVR.
When you are in a program folder:
- Delete a future recording by pressing the Red button on the remote control.
- View the available Actions by pressing the Green button on the remote control. Actions include Edit Item, Information, Go Back, Move to Folder, Sort List, Close Actions, and Delete Recording.
- Search for programs within the Recording folders by pressing the Yellow button on the remote.
- Sort the Current Recordings by pressing the Blue button on the remote control. By default, Current Recordings are displayed by date and time. If you press the Blue button, programs will be sorted by Name.
- Press the Skip Forward button to view recordings by title rather than group.
Future Recording Actions
To view the available Actions, press the Green button on the remote control. The Actions list displays on the right side of the screen. To make it easy for you, the list of Actions on the screen shows the corresponding button that you could press on the remote control. You can also highlight your selection and then press the OK button on the remote control.
To Edit the Item, press the OK button on the remote control. You can change the time that you Start Recording and Stop Recording. This allows you to begin and/or end recording to allow for time padding around the program.
- To Edit the Item, press the OK button on the remote control. You can change the time that you Start Recording and Stop Recording. This allows you to begin and/or end recording to allow for time padding around the program.
- To show or hide Information about the recording, press the INFO button. This expands or hides the view of information. Simply highlighting a recording and pausing for a brief moment will also display the information.
- To Go Back to the Future Recordings Folder List, press the LIST button.
- To group the recordings by their titles, select the Skip Forward button.
- To Move the recording to a specific folder, arrow to select Move To Folder.
- To Sort the List of Future Recordings, press the Blue button on the remote control. At the bottom of the screen you will see the sort change to being sorted by Name. Press the Blue button again to change the sort back to date and time.
- To Close the Actions, either press the Green button or press the EXIT button on the remote control.
- To Delete the Recording, press the Red button on the remote control. Select Yes or No to delete, and then press the OK button.
Series Recording Rules
Press the LIST button a third time to view your Series Recording Rules. These are the programs that you have set to record on a regular basis. You can make adjustments to your series recording rules from this screen. At the top of the screen you see the number of Series Rules and the amount of space you have free on the DVR.
- Delete a rule by pressing the Red button on the remote control.
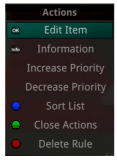
- View the available Actions by pressing the Green button on the remote control. Actions include Edit Item, Information, Increase Priority, Decrease Priority, Sort List, Close Actions and Delete Rule.
- Search for programs in the recordings folders by pressing the Yellow button on the remote.
- Sort the Series Rules by pressing the Blue button on the remote control. By default, Series Rules are displayed by Priority. If you press the Blue button, programs will be sorted by Name.
Series Rules Actions
To view the available Actions, press the Green button on the remote control. The Actions list displays on the right side of the screen. To make it easy for you, the list of Actions on the screen shows the corresponding button that you could press on the remote control. You can also highlight your selection and then press the OK button on the remote control.
- To Edit the Item, press the OK button and choose from these options to edit:
- Choose how many episodes to Keep at Most any given time. Options are 1 – 10 or All episodes. Use the arrow buttons to make your selection.
- Choose the Show Type that you wish to record. You may choose to record all episodes of a program or just new episodes.
- Choose when to Start Recording. You can begin ‘on time’ when the program is scheduled to begin. Or you can use the arrow buttons to choose 1, 2, 3, 4, 5,10, or 15 minutes early.
- Choose when to Stop Recording. You can stop ‘on time’ when the program is scheduled to end. Or you can use the arrow buttons to choose 1, 2, 3, 4, 5,10, 15, 30, 45, or 60 minutes late.
- Finally choose the Folder where you want to save the recording and whether you’d like your television to auto tune to the channel. Arrow to highlight Update Series Recording and press the OK button on the remote control to save your changes. To Cancel your changes, highlight Exit and press the OK button on the remote control.
- To show or hide information about the recording, press the INFO button. This expands or hides the view of information. Simply highlighting a recording and pausing for a brief moment will also display the information.
- The priority of programs is represented by their order in the list. The top program on the list is the highest priority, and the bottom one is the lowest priority. If you have several programs scheduled to record at once and the system is unable to provide resources to record all of them, the DVR will record based on highest priority. To change Priority, simply highlight the Action to Increase or Decrease Priority and then press the OK button to adjust priority.
- To Sort the List of Series Rules, press the Blue button on the remote control. By default Series Rules are sorted by their Priority. You can change them to sort by Name. Press the Blue button again to change the sort back to Priority.
- To Close the Actions, either press the Green button or press the EXIT button on the remote control.
- To Delete the Rule, press the Red button on the remote control. Select Yes or No to delete and then press the OK button.